Category: Free Inquiry
This is the category to apply to your Free Inquiry posts.
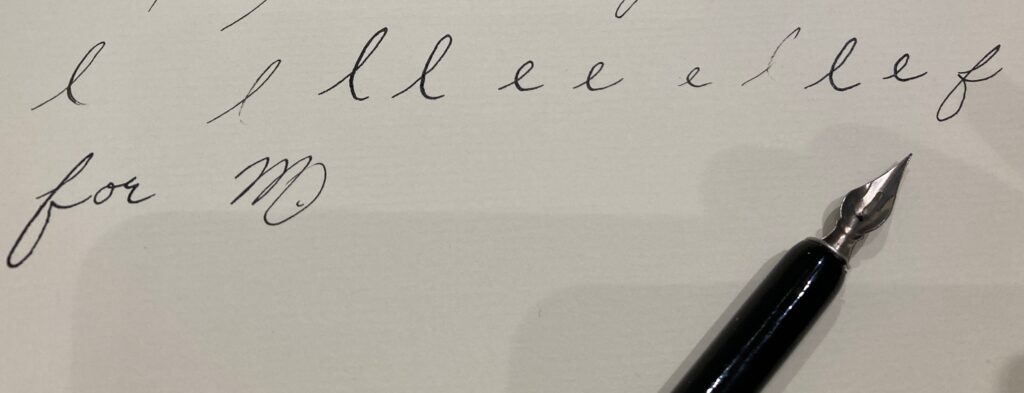
Well, with all the rusty nib business it’s been awhile since I’ve practiced the calligraphy writing so I planned ahead and brought calligraphy paper, ink, and nibs on our family weekend away, OOOps! Scrunched paper….CLASSIC.
My goal at the start of this inquiry was to be able to write fancy Mom love notes to my kids. P.S. They are a great audience as they still think some of the things I do are Amazing!
So, I realize that I need many more hours practice to get the thin and thick lines consistent within words. Anyhoo…Here’s what I’ve got so far

Thecrookedcalligraphy website has free traceable calligraphy practice sheets to help beginners practice various strokes and words. There’s even one that helps you to regulate your breathing so that your thin upstrokes and thick downstrokes improve. Sounds like a 2 fur 1: calligraphy and meditation!!!Think I might try that.
So, I found this video on calligraphy meditation and it must be relaxing cause it’s 5 minutes of sleep inducing boredom. I’m pleased to be able to share it with you here. I think they are writing on kleenex in case you need to wipe the tears of boredom from your eyes.
So the above love notes will go on the kids’ pillows tonight so they know how much they are loved.
‘Till next time…
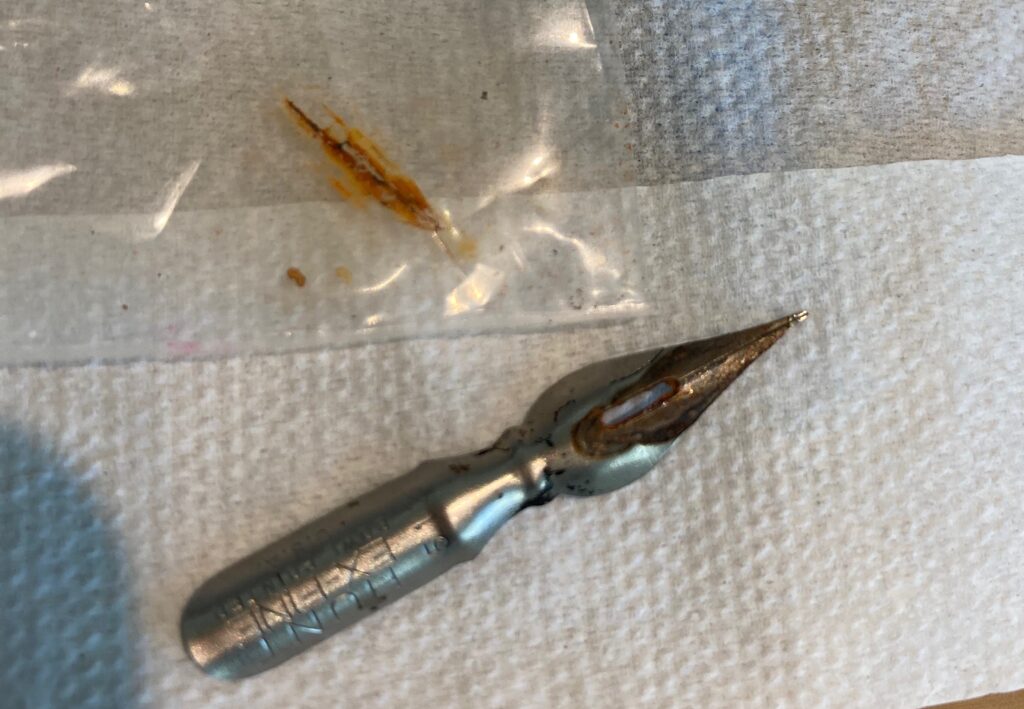
The moment you have all been waiting for………
DID THE RUSTY NIB SURVIVE?

So I followed the recommendation from moonandtide by scrubbing with an old toothbrush with baking soda and a bit of water.

Here it is…THE REVEAL……
I was hoping for some sparkles but what I got was a damaged nib but free from red rust so hopefully I have arrested (ha ha) the process of degradation.

More importantly…Does it still work?
Will it make my calligraphy Sparkle?
What do you think?
Hey….Be nice
Sorry folks you’re going to have to wait till next week to find out the fate of the poor rusty nib… I know I can hear your groans and whimpering….Sorry But…
As it turns out I had to devote myself to some family time and cuddle time with furry little cuties in order to restore some balance. And everyone loves a celebrity, so here she is: Nutmeg!!!!!!!


A huge shout out to Guinea Pig Owner and Trainer Extraordinaire Kylee. Check out Her Adventures with nutmeg here. Thank you so much for inviting us to spend time with these cuties. Also praises for my calm kids who were so respectful to these cute little creatures.
Onto a little tech now. I created an animated video last semester using powtoon for my inquiry on restitution as an approach to discipline in education. It was a steep steep steep learning curve and I’m glad I got some help from Coleen. It’s actually pretty user friendly once you get into it but as in any free app like that you are limited on the free templates but see what I was able to do for free. Here it is:
“Rusty nibs! How the internet tells you to care for calligraphy nibs, and what I actually do!” from moonandtide site
So a few options for storing nibs so that they stay bone dry:
store with silica gel
oil them?
storing them separately because rust begets rust
SOOOOO… can I salvage this nib?
There are 2 kinds of rust; surface rust and red rust. AHHHH! It looks red to me but “Nibs are so tiny it can’t be easy to tell the difference, but if your nib is fairly new and has a spot of rust on it, it might just be salvageable. Get an old toothbrush and a pinch of bicarbonate of soda, and rub gently (with a drop of water). Surface rust will clean away, and your nib might be ok to use.”(moonandtide)
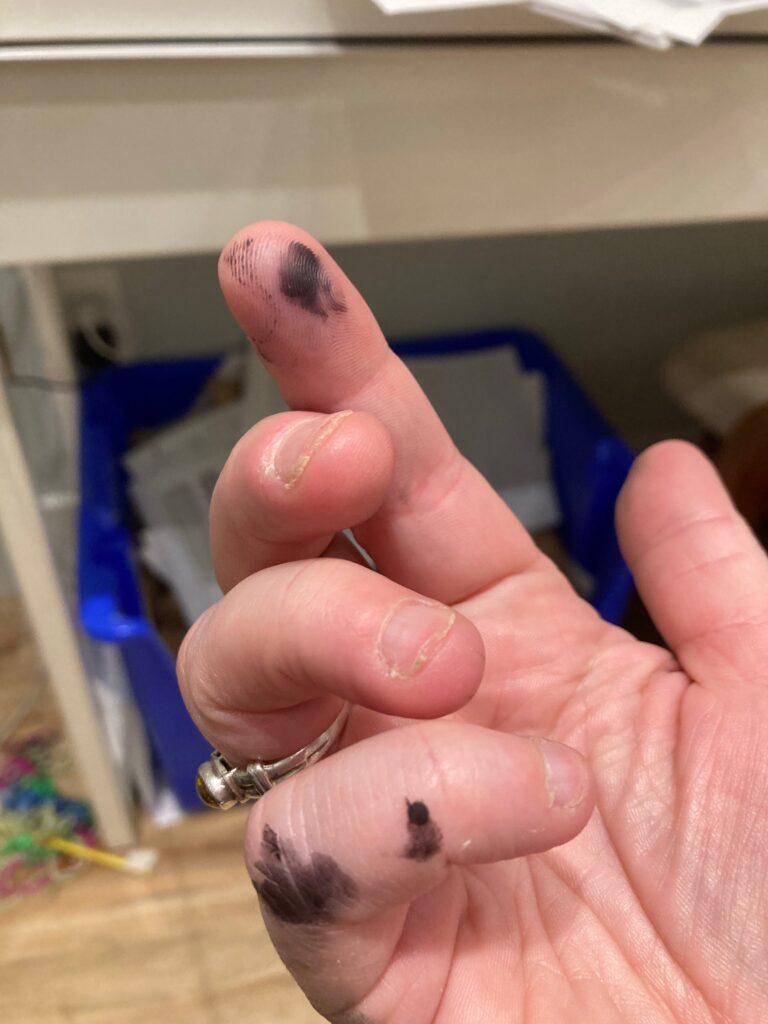
Apparently I was NOT supposed to dunk my nib in water to clean it. OOPS! My nib went for a thrash and sink in the water as I happily and naively cleaned it. Kinda like I was cleaning paintbrushes in kindergarten. You all know what I mean right?
Here is a video which can be used as a shaming device for my nib cleaning technique.
Live and learn right? So come back again and check it out next time to see how my nib has survived!
I went to Opus downtown and was served by a very helpful sales associate who explained many of the intricacies of choosing beginning caligraphy materials. He had a message about art inquiry which was that if it doesn’t feel good then you won’t stick with it so find what feels nice for you.

The take-away was that that crappy broken pen I was using previously was sapping the joy and interest from me. Moreover, I went with the multicoloured ink kit over just the plain black to spark some renewed joy! lets get started!!
This equipment has a completely different feel and creates a totally different look to the calligraphy. It feels as if I’m starting at the beginning again somewhat since it takes time playing with the different pens, nibs, ink, and paper to get a feel for the right hand position, speed and firmness. I will continue practicing the basic strokes before going any further yet. I played bit with the coloured inks but couldn’t get the lid open on the blue. oh well, more to look forward to for next time. Check out my practice here.

Until next time folks when I may even attempt a letter…woooooooey.
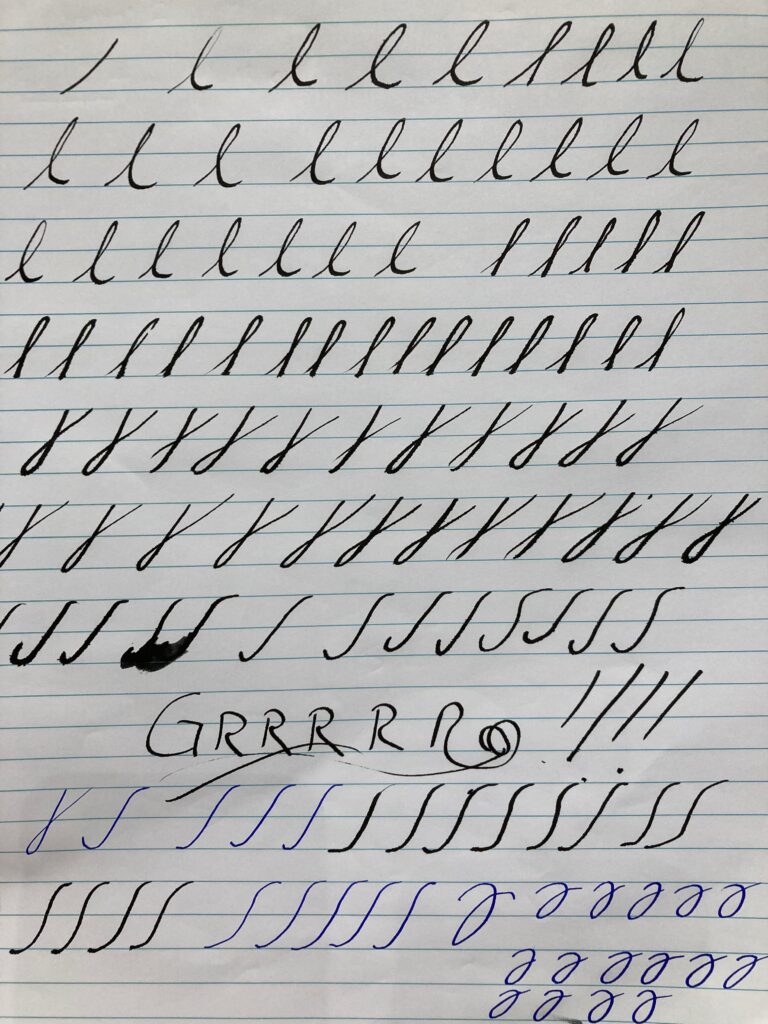
So, I’ve been sticking with the medium tip as recommended which has the black ink to practice basic strokes 5-8:
5. the ascender stroke
6. the descender stroke
7. the capital stem
8. the loop
I’ve been wondering for awhile if my nib is faulty as it is extremely difficult to get a hairline (fine part of the line when applying very light pressure.) It’s as if too much ink is coming out at all times. But… I figured…. I’m a beginner so I probably just need more practice. Then this…
Then I went to recap my pen…Da Da Da DUMMMMMMM…..

So I guess I’m off to Opus or Art World downtown to purchase some new supplies.
But first lets you tube it.
I looked at Love & Lavender blog for the best 6 calligraphy pens for beginners which has tips for deciding what to purchase.
So check in soon to see if I can resolve this problem and make some gorgeous hairlines.
Shout out to Kendall, one of my followers who suggested I set a calligraphy goal to complete by April. As much as I would like a ridiculously elegant & organized spice rack (who wouldn’t?), I think that’s overly ambitious, as I don’t even have a spice rack yet so:
My plan is to make “Care Share” notes for my kids in calligraphy (you know those little notes Mom secretly puts on your pillow or in your lunchbox so you feel more loved than any other creature on earth at that moment?) If I get really good then maybe I’ll even add an inspirational quote or a deep thought.
Check out this Deep thought.
Tee Hee, I bet Roz would love that.
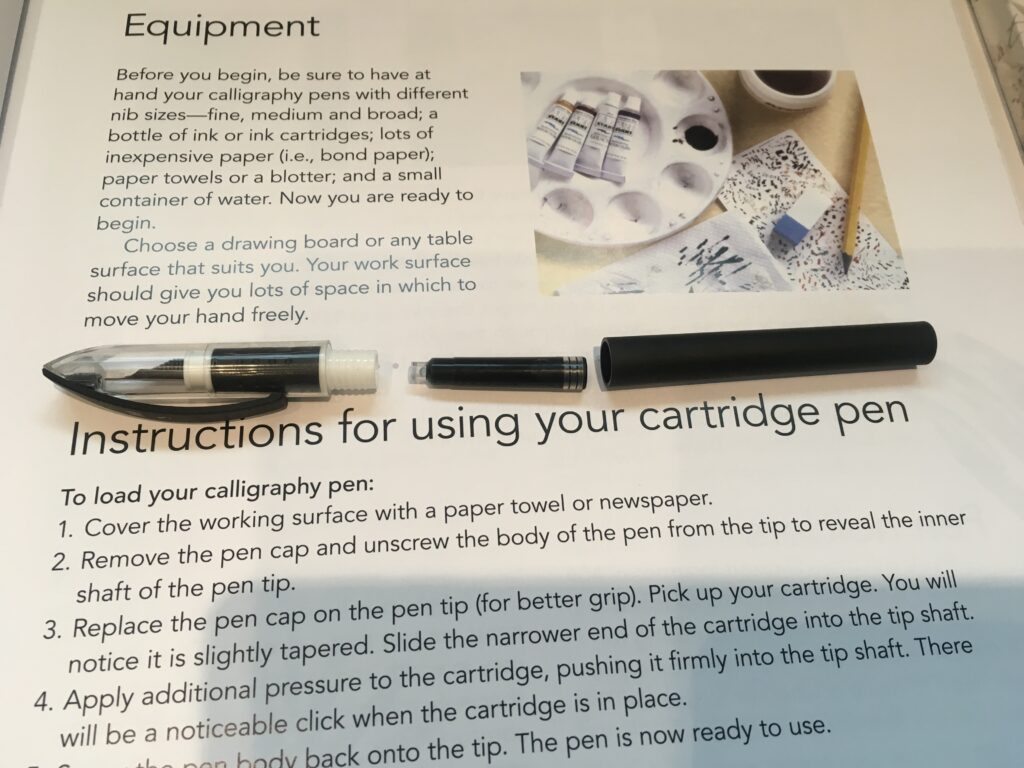
So I will be using cartridge pens for my learning so it’s really easy to get started:
First choose the fine tip, medium, or thick nib pen then choose your ink colour. Insert ink cartridge into pen as shown below and push until you feel and hear a solid click.
You are almost ready to go!!
But First…Brand new nibs require “prepping” as they come with a protective lacquer on them which needs removal and there are 3 ways you can do this:
- wash with mild dish soap, then rinse in warm water and dry.
- Wipe nib with some toothpaste straight from tube (why do they say this? where else you gonna get it???? what???) then wash off and dry
- run nib back and forth through a naked flame for a couple of seconds.
So obviously I choose the most fun method. FIRE!
How to hold the pen. Not in a death grip and R..E..L..A..X.. Hold it fairly low down so you have good control and stability. There were no other instructions for this part and since I was getting poor results at this point I headed off to you tube.
I will next be practicing the pressure and release rule and a few basic strokes. The pressure and release rule is:
Every time you make a downward stroke, apply some pressure which allows the nibs to open allowing more ink to be released which causes a thicker stroke.
When you make an upward stroke, release the pressure and the nib closes which makes a thinner line.
Other tips to consider:
- The tip of the nib should point in the direction of your slant line (see image below)
- Aim to use the whole of the tip of the nib (not rotated)
- if you are right-handed rotate the page to the left and vice versa if you are left-handed.
- Proceed slowly. Think of it as art rather than fast writing.

I will practice 4 of the 8 basic strokes today:
- Downward Stroke
- Hairline Stroke
- Pressure and Release Stroke
- The oval

This is a heck of a lot more difficult than I imagined. That spice rack labelling may be in the distant future folks. Lol.

Until next time; I will keep practicing…
I have always been impressed by the beautiful writing on place cards and greeting cards. It transports me to a time when beauty was important in everything from architecture to wigs to penmanship. It also appeals to me as a meditative art form which also has practical applications. Just imagine next years Christmas gift tags!!
I have acquired a kit “Complete Book Of Calligraphy” which includes lessons, paper, pens, & ink. It claims that I can “learn the art of calligraphy in simple steps.” Hope so! I’m curious about the different types or styles of calligraphy as well as it’s applications. I wonder if it can it be done digitally. I’m thinking of a beautifully labelled and organized spice rack. A mom can dream right?
Pablo Picasso said, you should “Learn the rules like a pro so you can break them like an artist,” and it seems there’s a lot to learn before putting pen to paper so let’s jump in!
Supplies & Materials

You don’t need many tools to get started. I will need: Calligraphy pen, nibs (fine, medium, & broad), bottle of ink or ink cartridges, paper towels or a blotter, a small container of water, & paper.
test